Vampire Craft for Kids
Today I have a fun, easy, cute craft idea for Halloween…. It could also be a really cute craft idea to help tech the letter V! We are going to make a Vampire Craft for Kids! There are not too many nouns that children know that start with the letter V… vampire is one of them! If you would like to teach the letter V with this craft, here are a few good letter V books OR, here is a fun Halloween book!
There Was an Old Lady Who Swallowed a Bat!

Vampire Craft for Kids
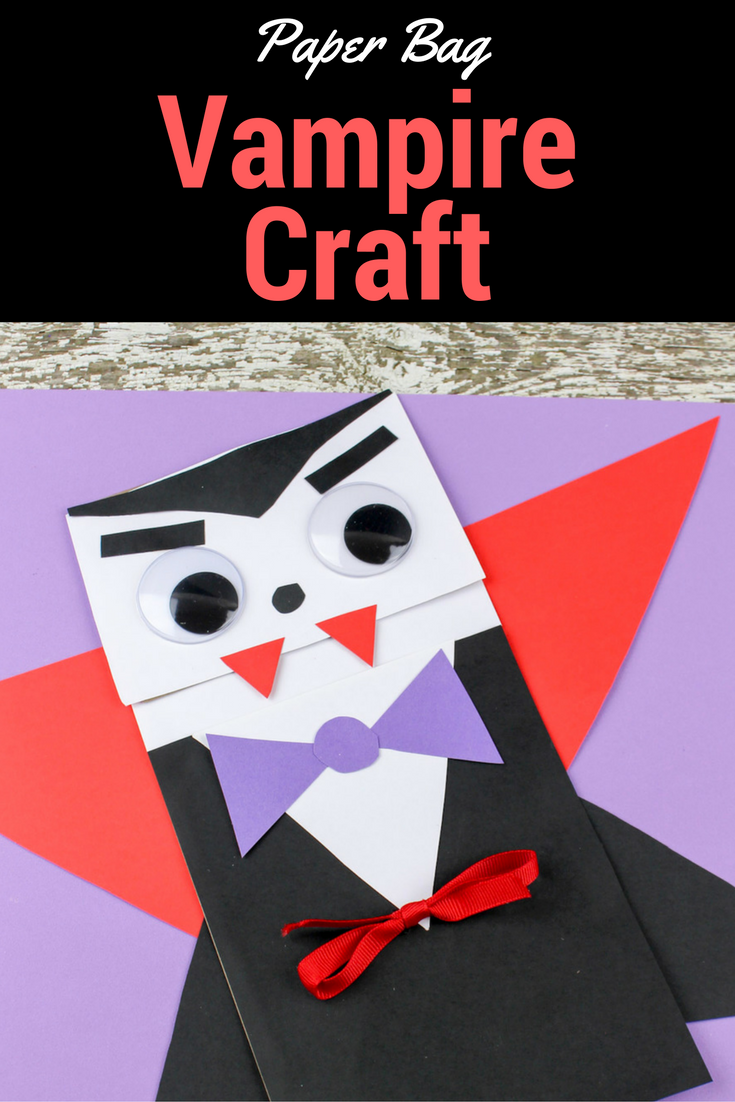
To make your Vampire Craft for Kids, you will need:

SUPPLIES NEEDED
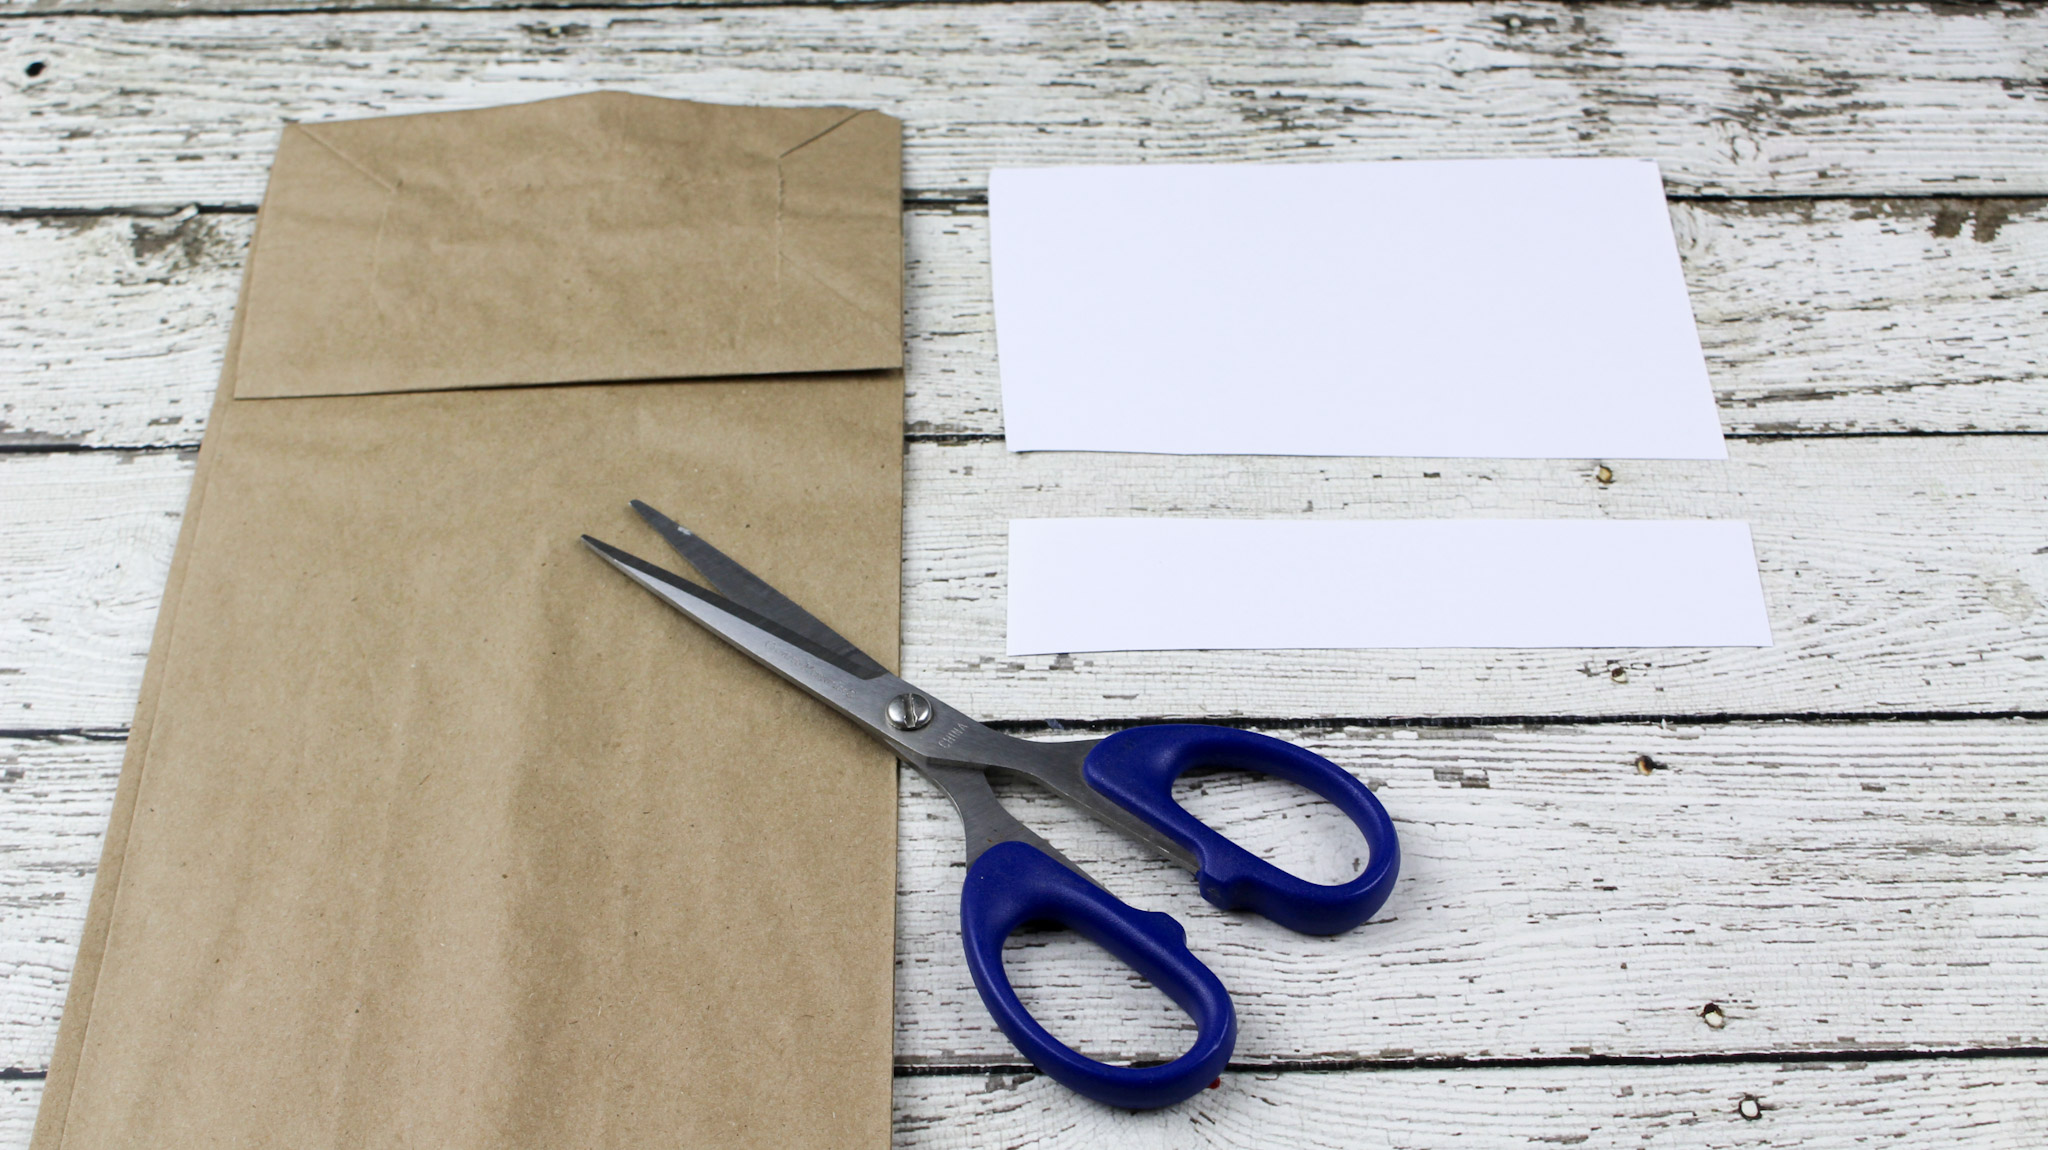
1 paper bag
1 white construction paper
2 black construction paper
1 red construction paper
1 red construction paper
Scissors
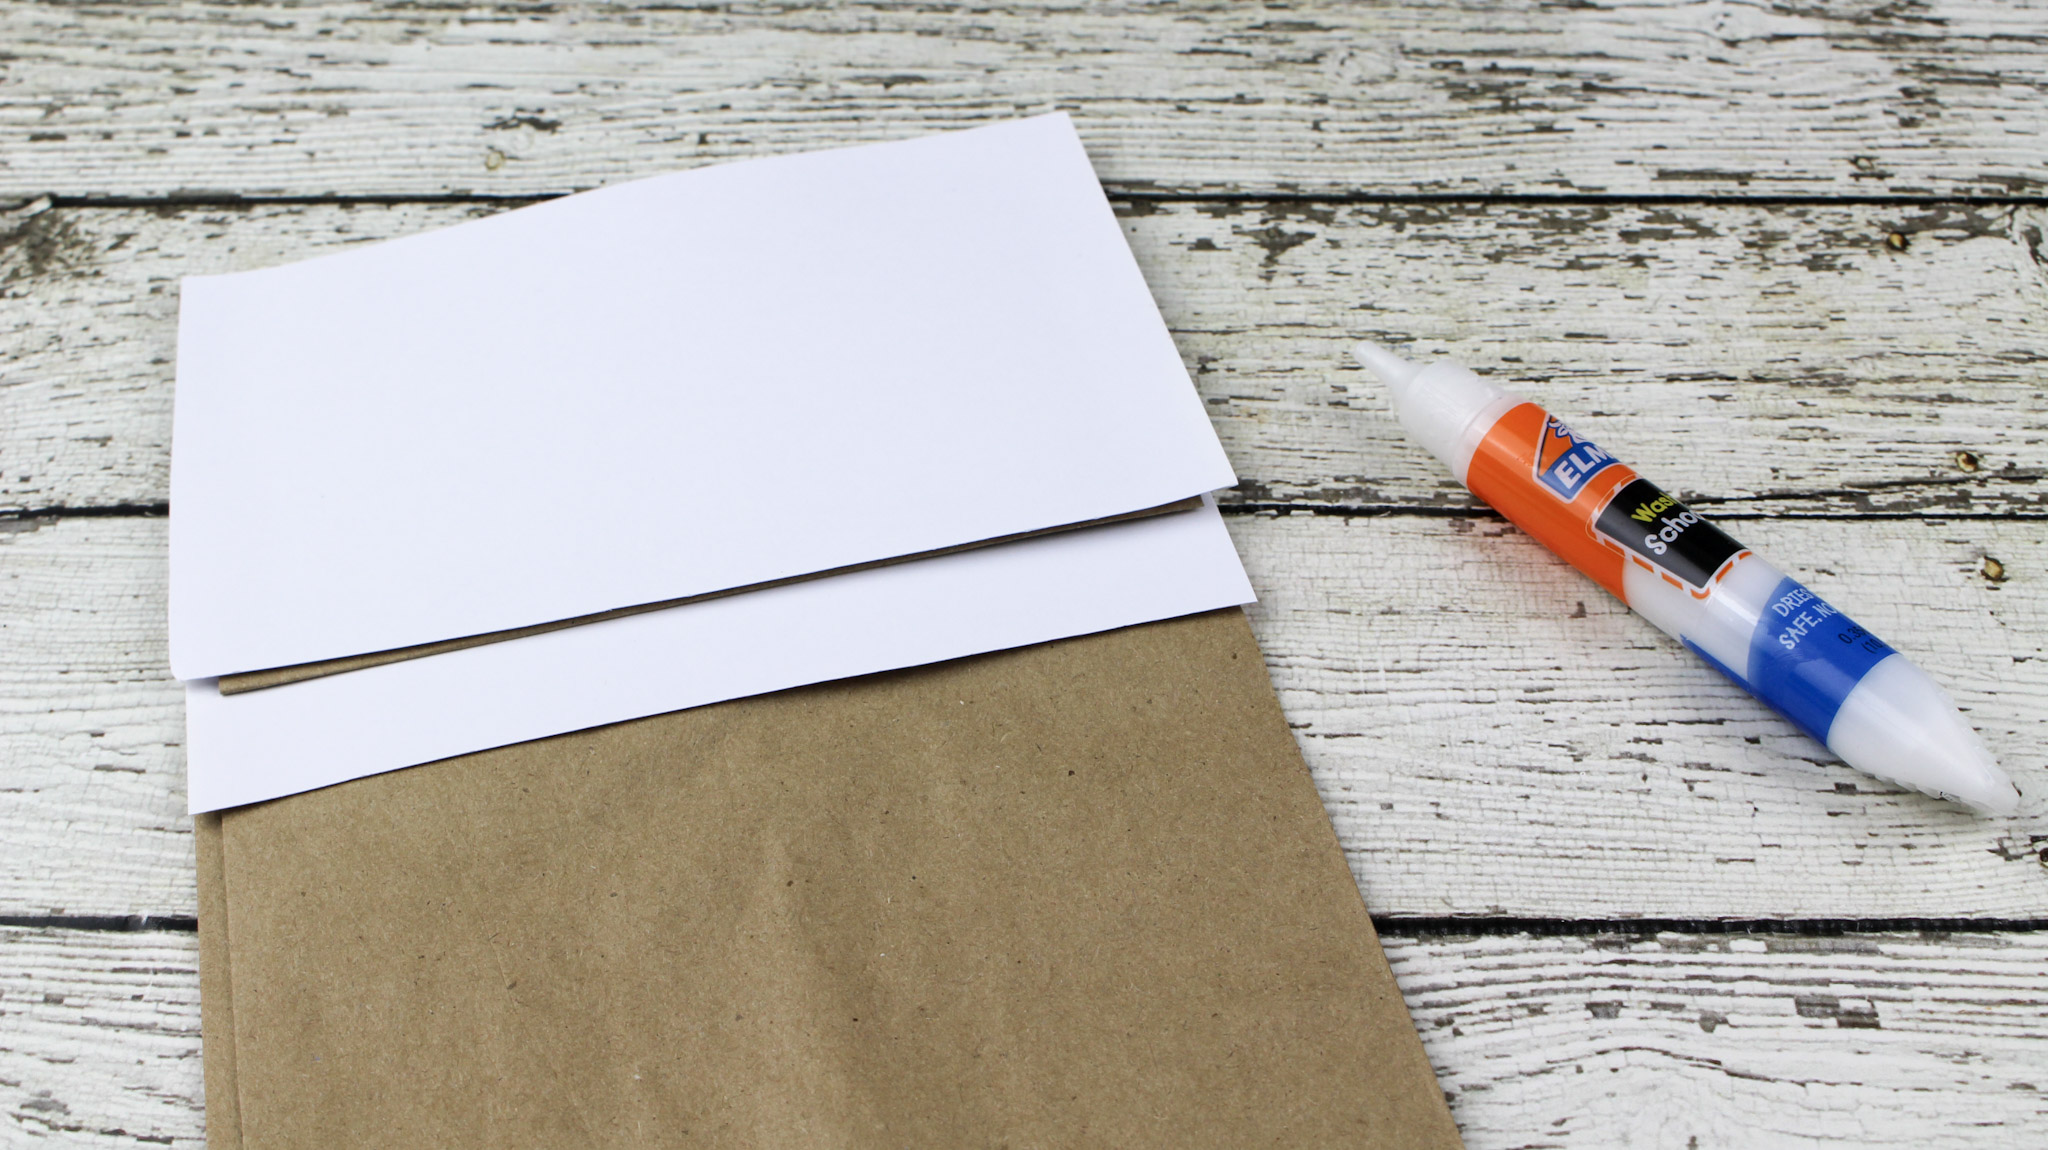
Elmer’s Glue stick/pen
2 large googly eyes
Hole puncher (optional)
Red ribbon

HOW TO ASSEMBLE
1. From the piece of white construction paper, cut out a rectangle equal to the size of the bottom of the paper bag. Glue to the bottom of the bag. This will be the vampires’ head.
2. Cut out a strip of white paper and glue directly under the vampire chin. You will have to lift the bottom of the bag and glue the top half of the strip underneath it. The bottom of the strip will stick out underneath the chin. This will represent the vampires’ collar.
3. Cut out a large rectangle equal to the remaining vampire ‘body’ of the paper bag from the black piece of construction paper. Glue the piece onto the bag.

4. From the black paper, cut out 2 right angle triangles to represent the bottom of your vampires’ cape. Glue to the back of the paper bag, one on each side.
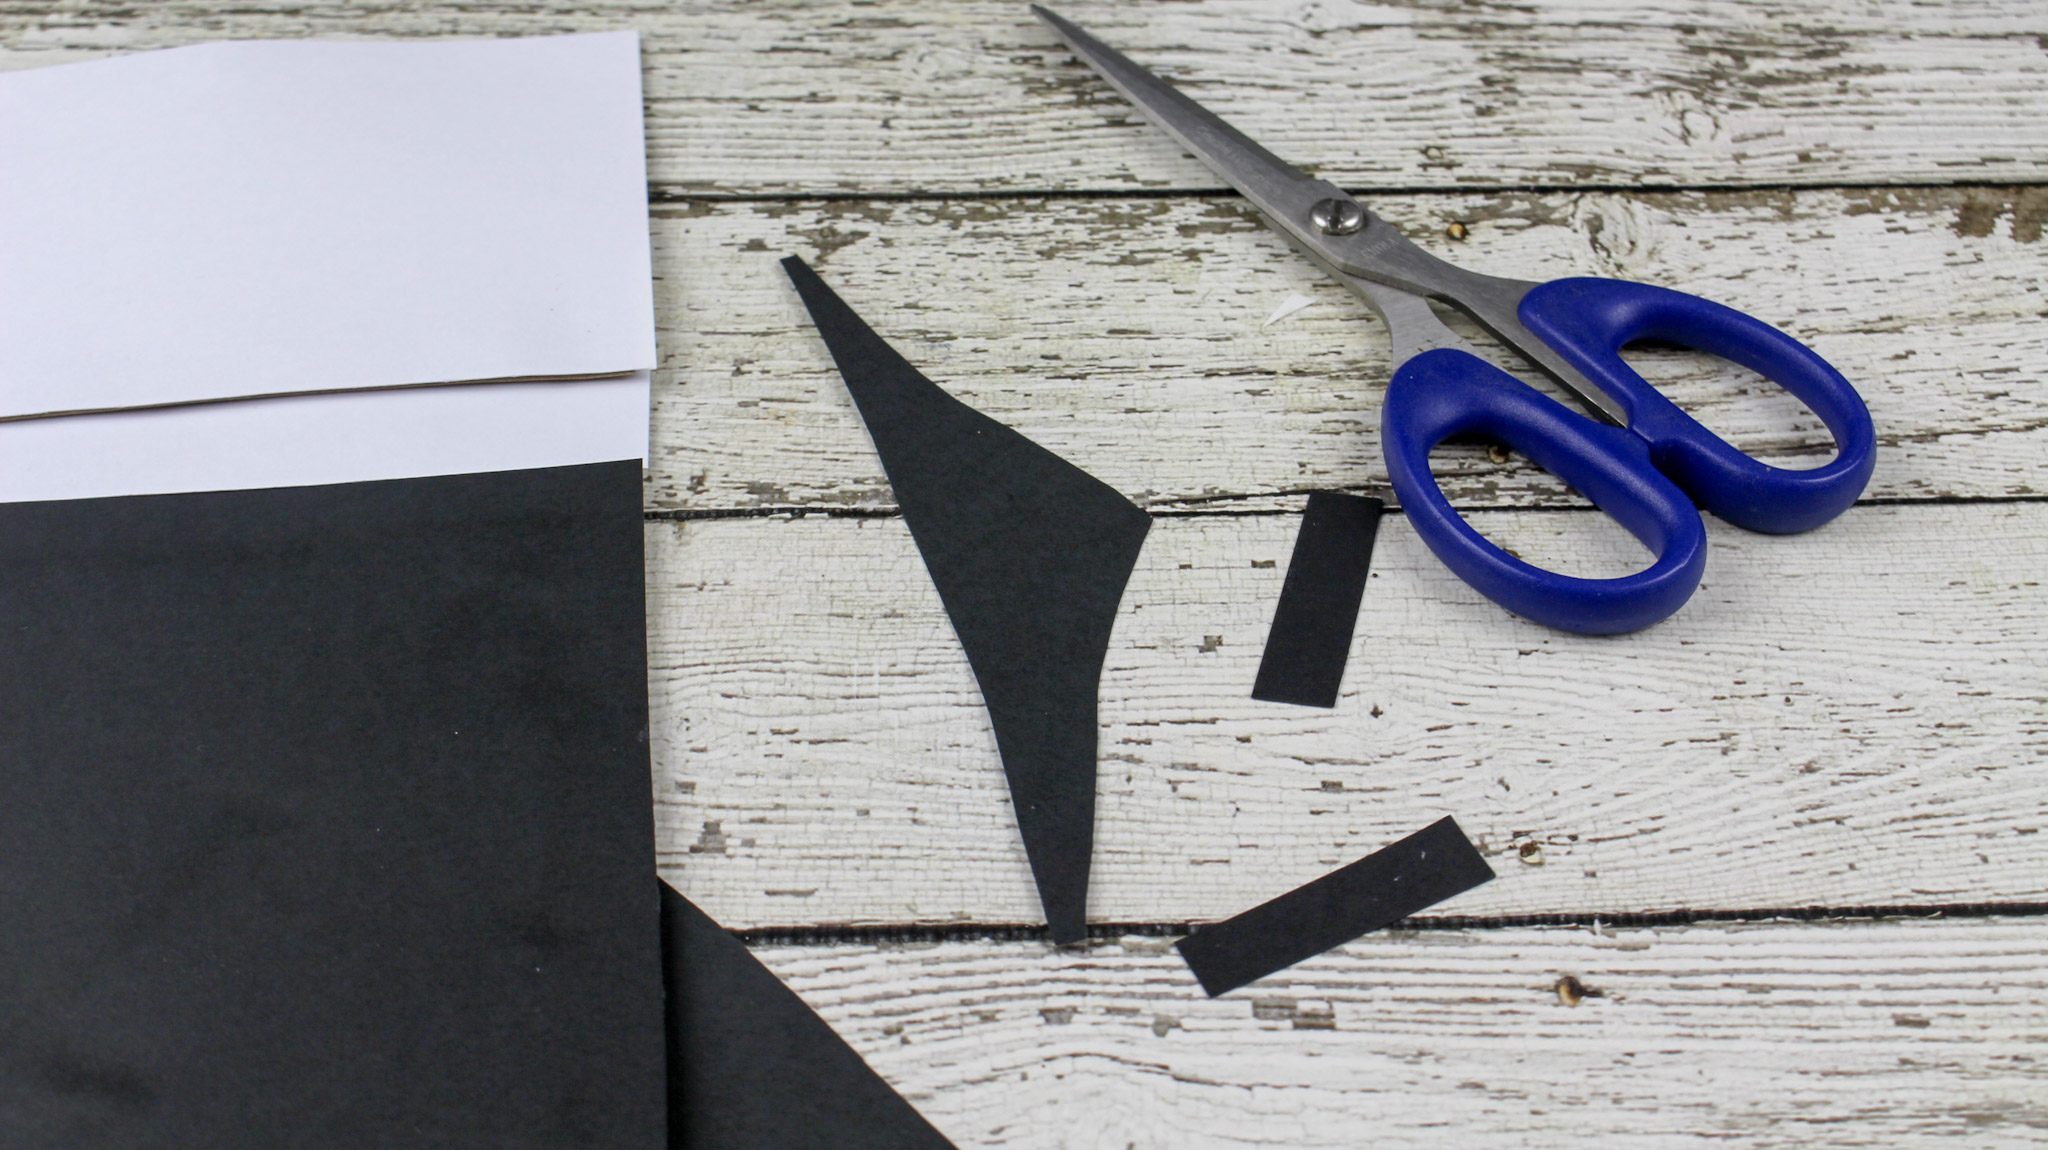
 5. Cut out black hair for the vampire and glue onto the top of the head. I used a long, skinny triangle shape for the hair.
6. Apply glue to the back of the googly eyes and glue onto the vampire face.
7. Cut out two small rectangles and a small circle for the eyebrows and nose. Glue onto the face.
8. From the red construction paper, cut out 2 right angle triangles to represent the top of the cape. Apply glue to both pieces and adhere them to the back of the paper bag. The top part of the cape should be adjacent to the bottom third of the face.
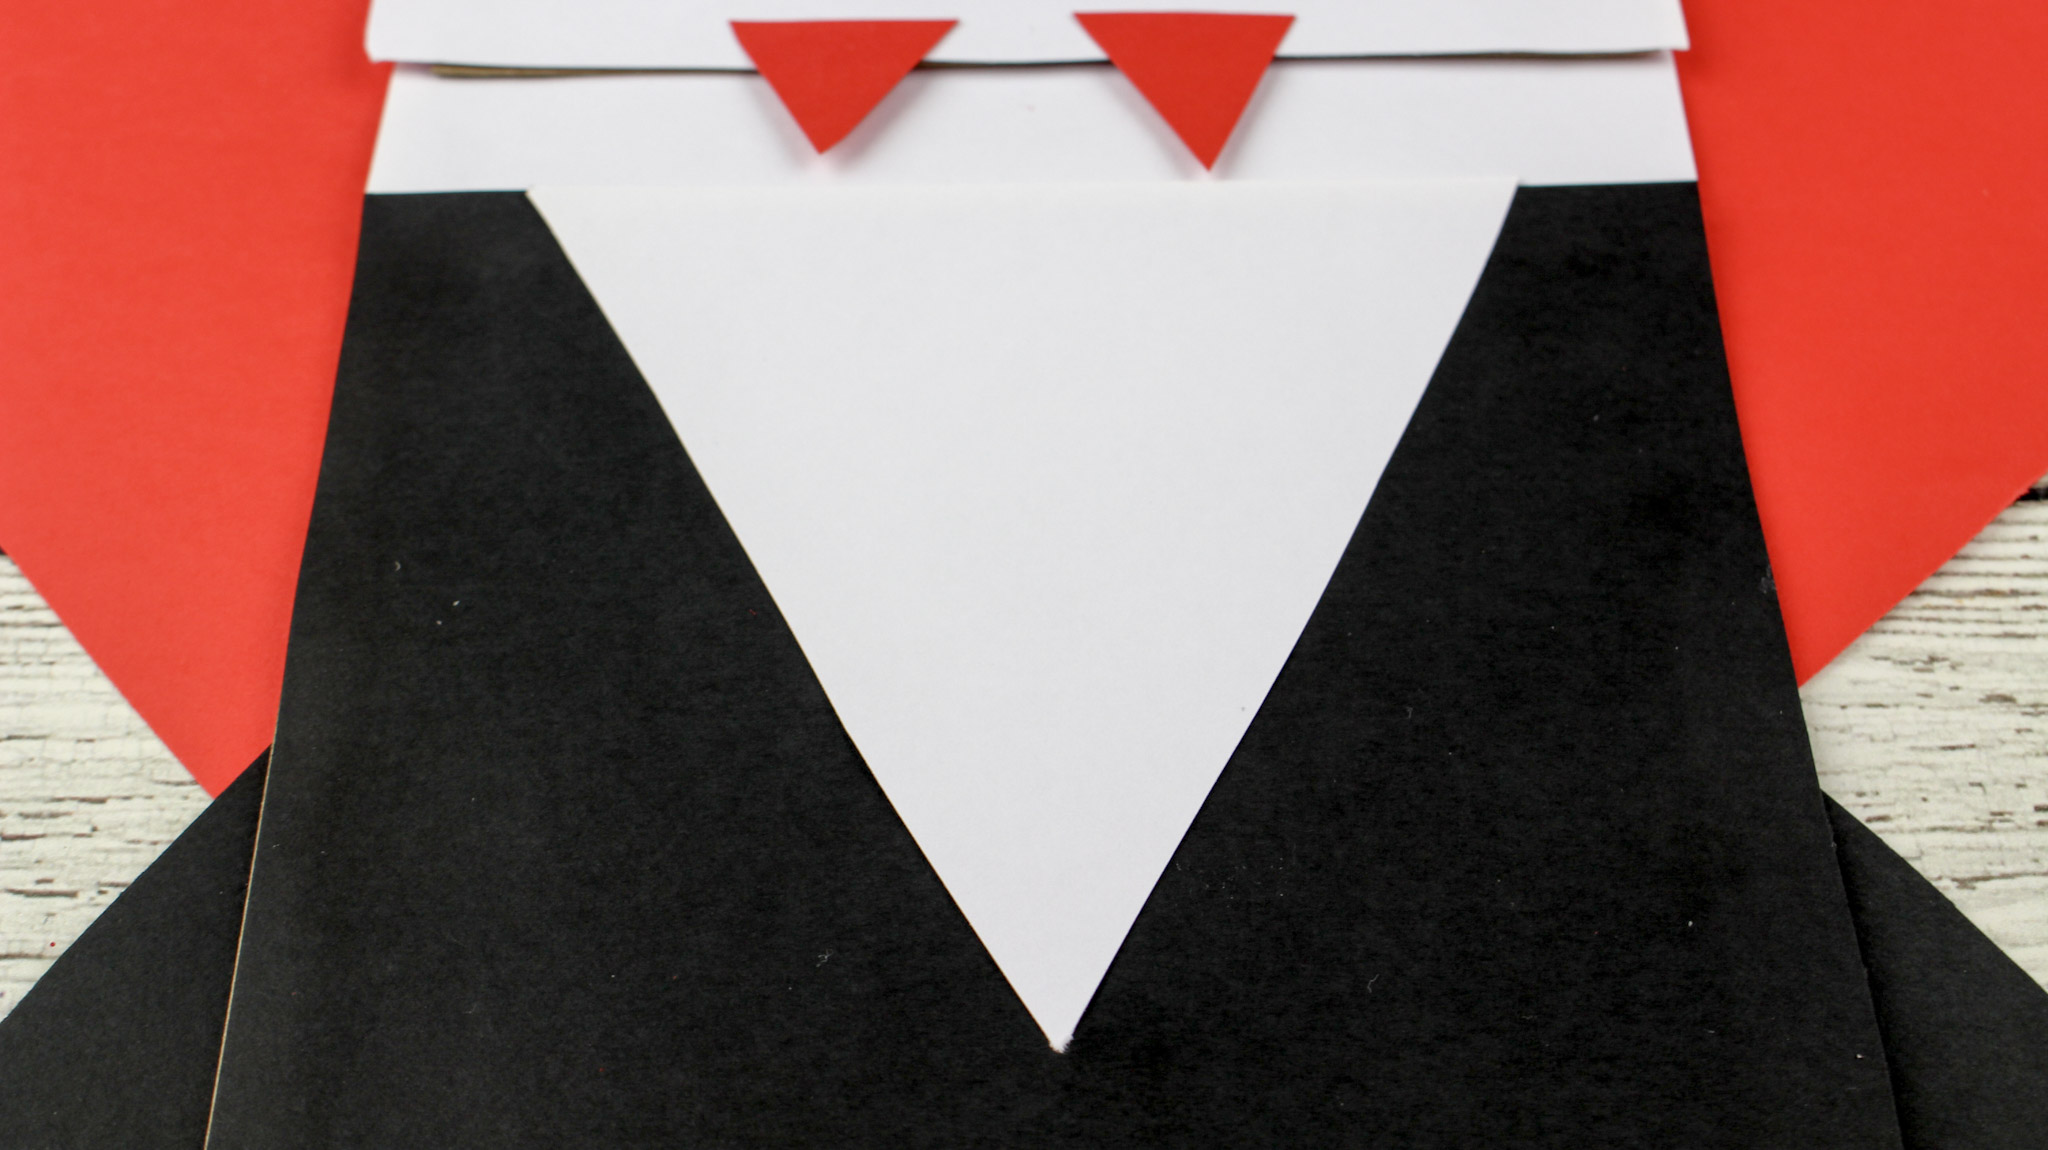
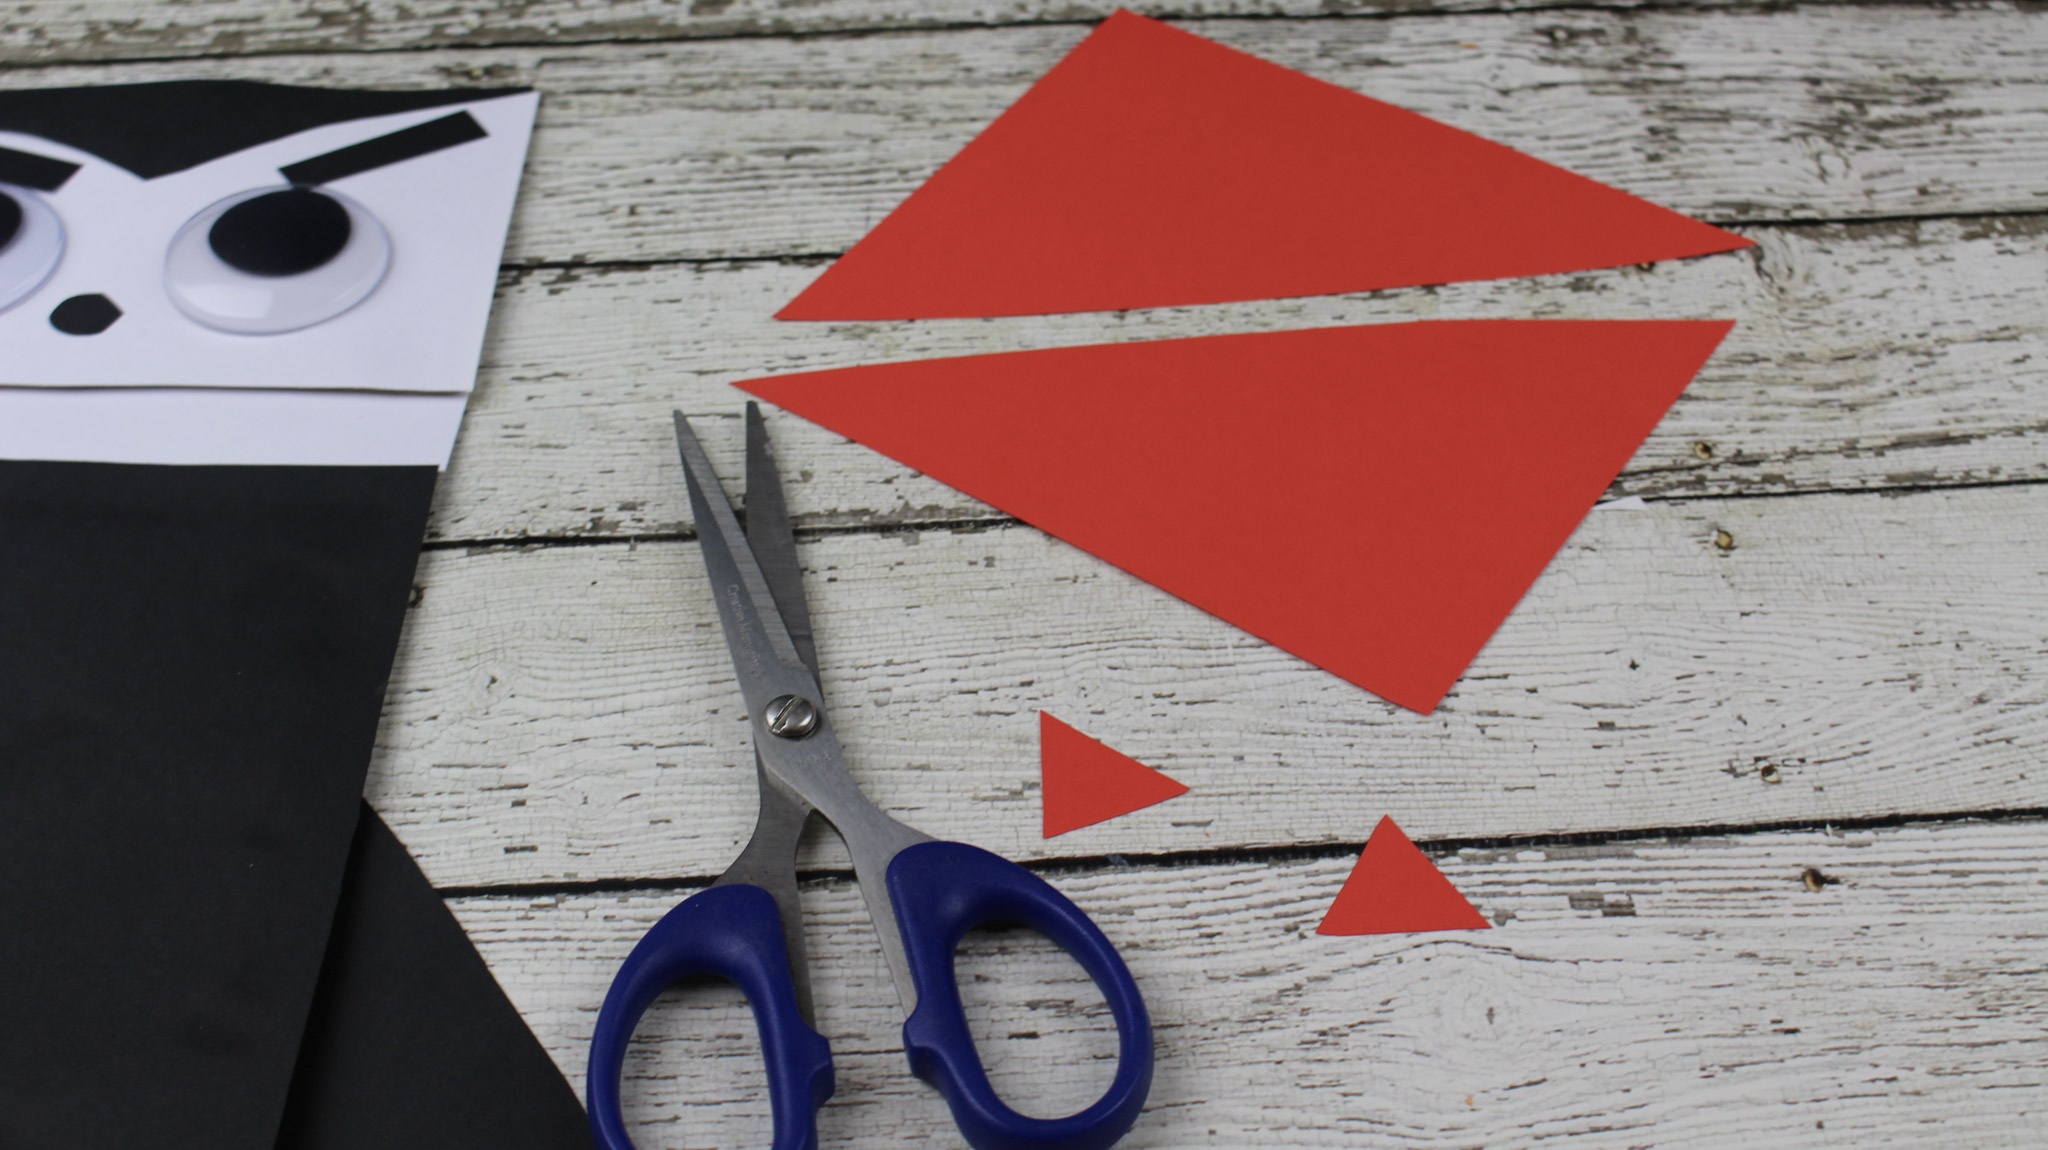 9. For the vampire’ fangs, cut out 2 small triangles from the red paper. Glue towards the bottom of the face.

10. Cut out a triangle from the white paper to resemble the vampires’ white shirt. Pipe glue on the back of the triangle and place the base against the collar with the tip of the triangle facing downward.
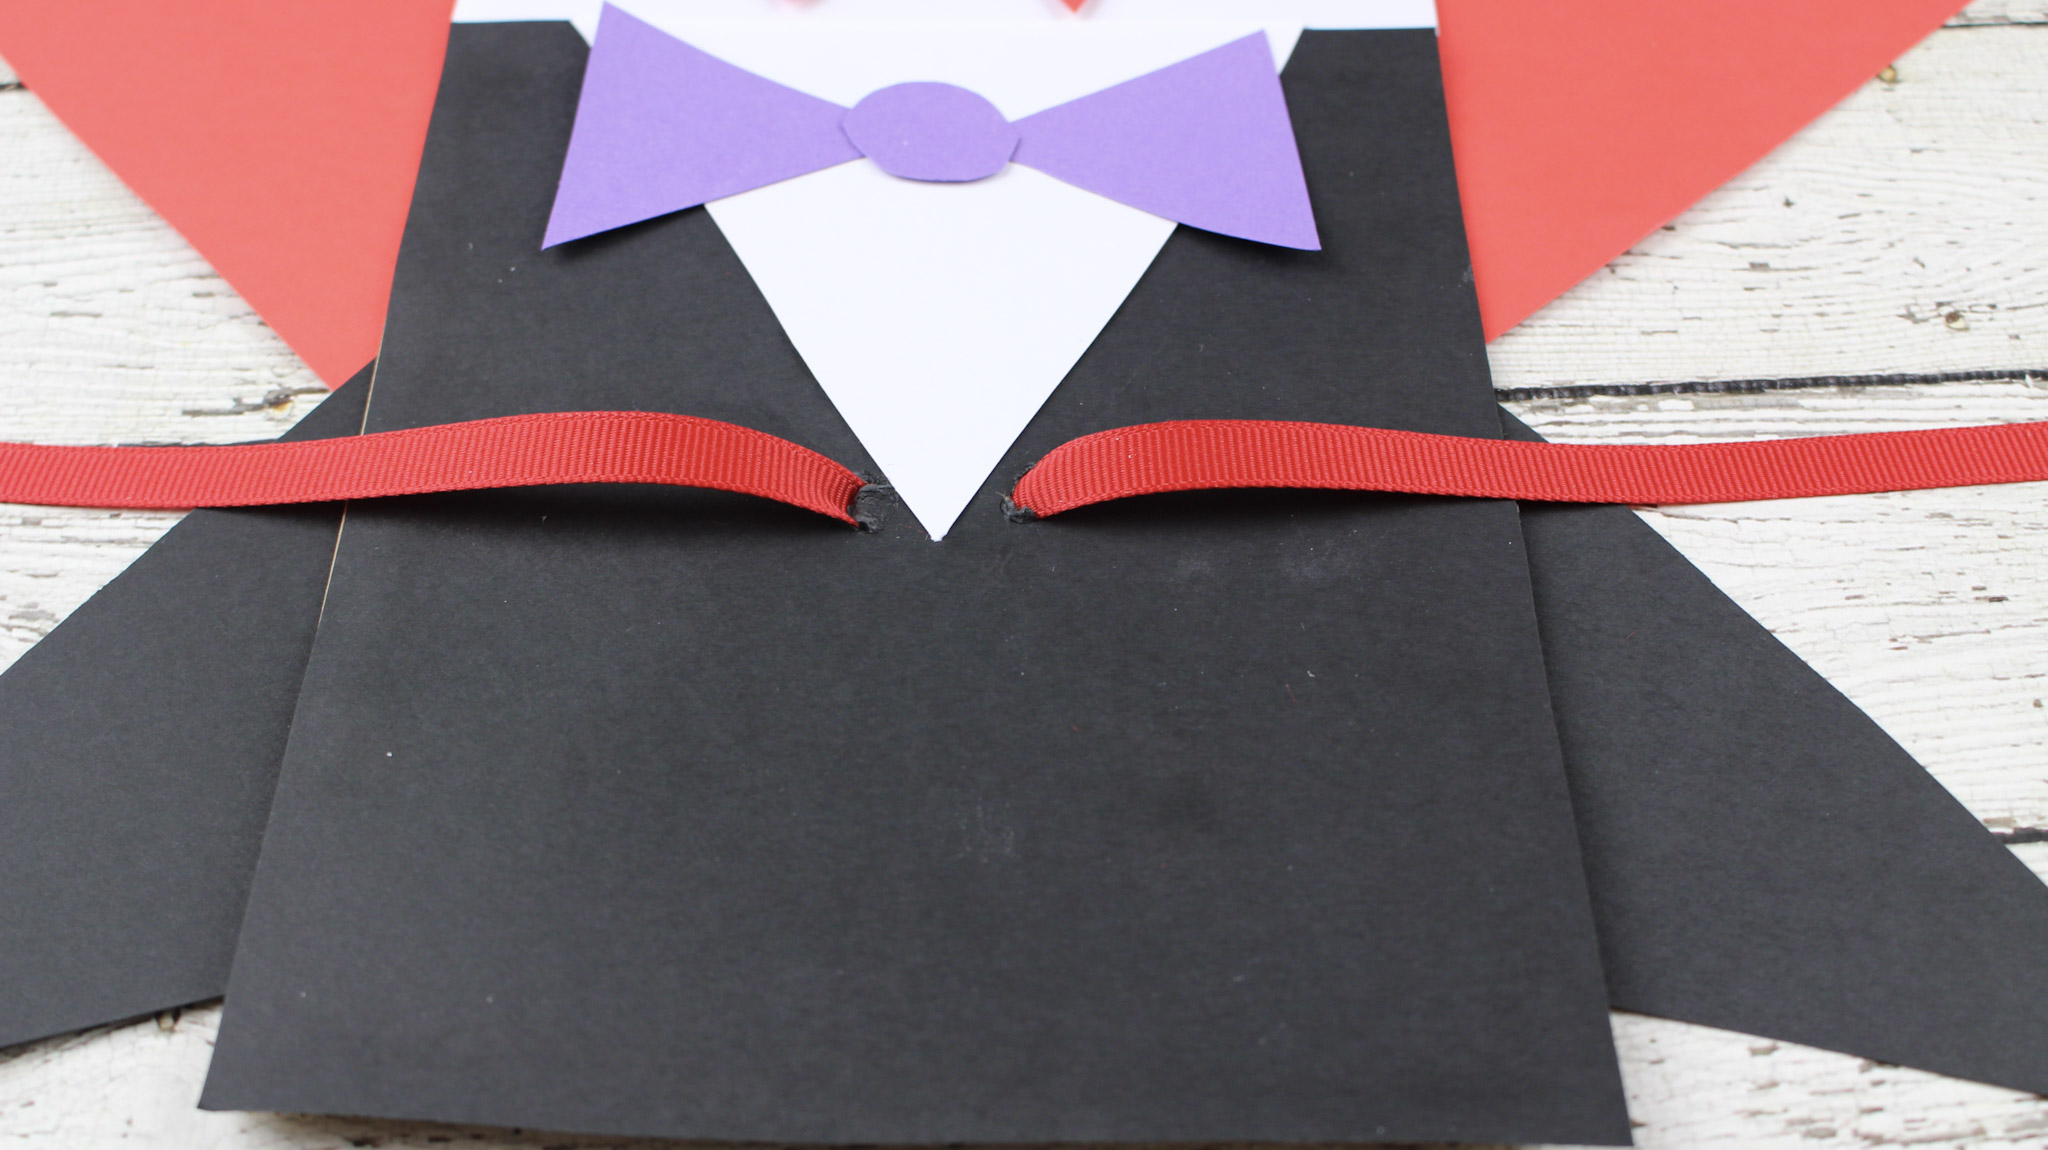
11. For the vampires’ bowtie, cut out two triangles and a circle from the purple construction paper. Glue the bow tie at the top of the shirt, under the collar.

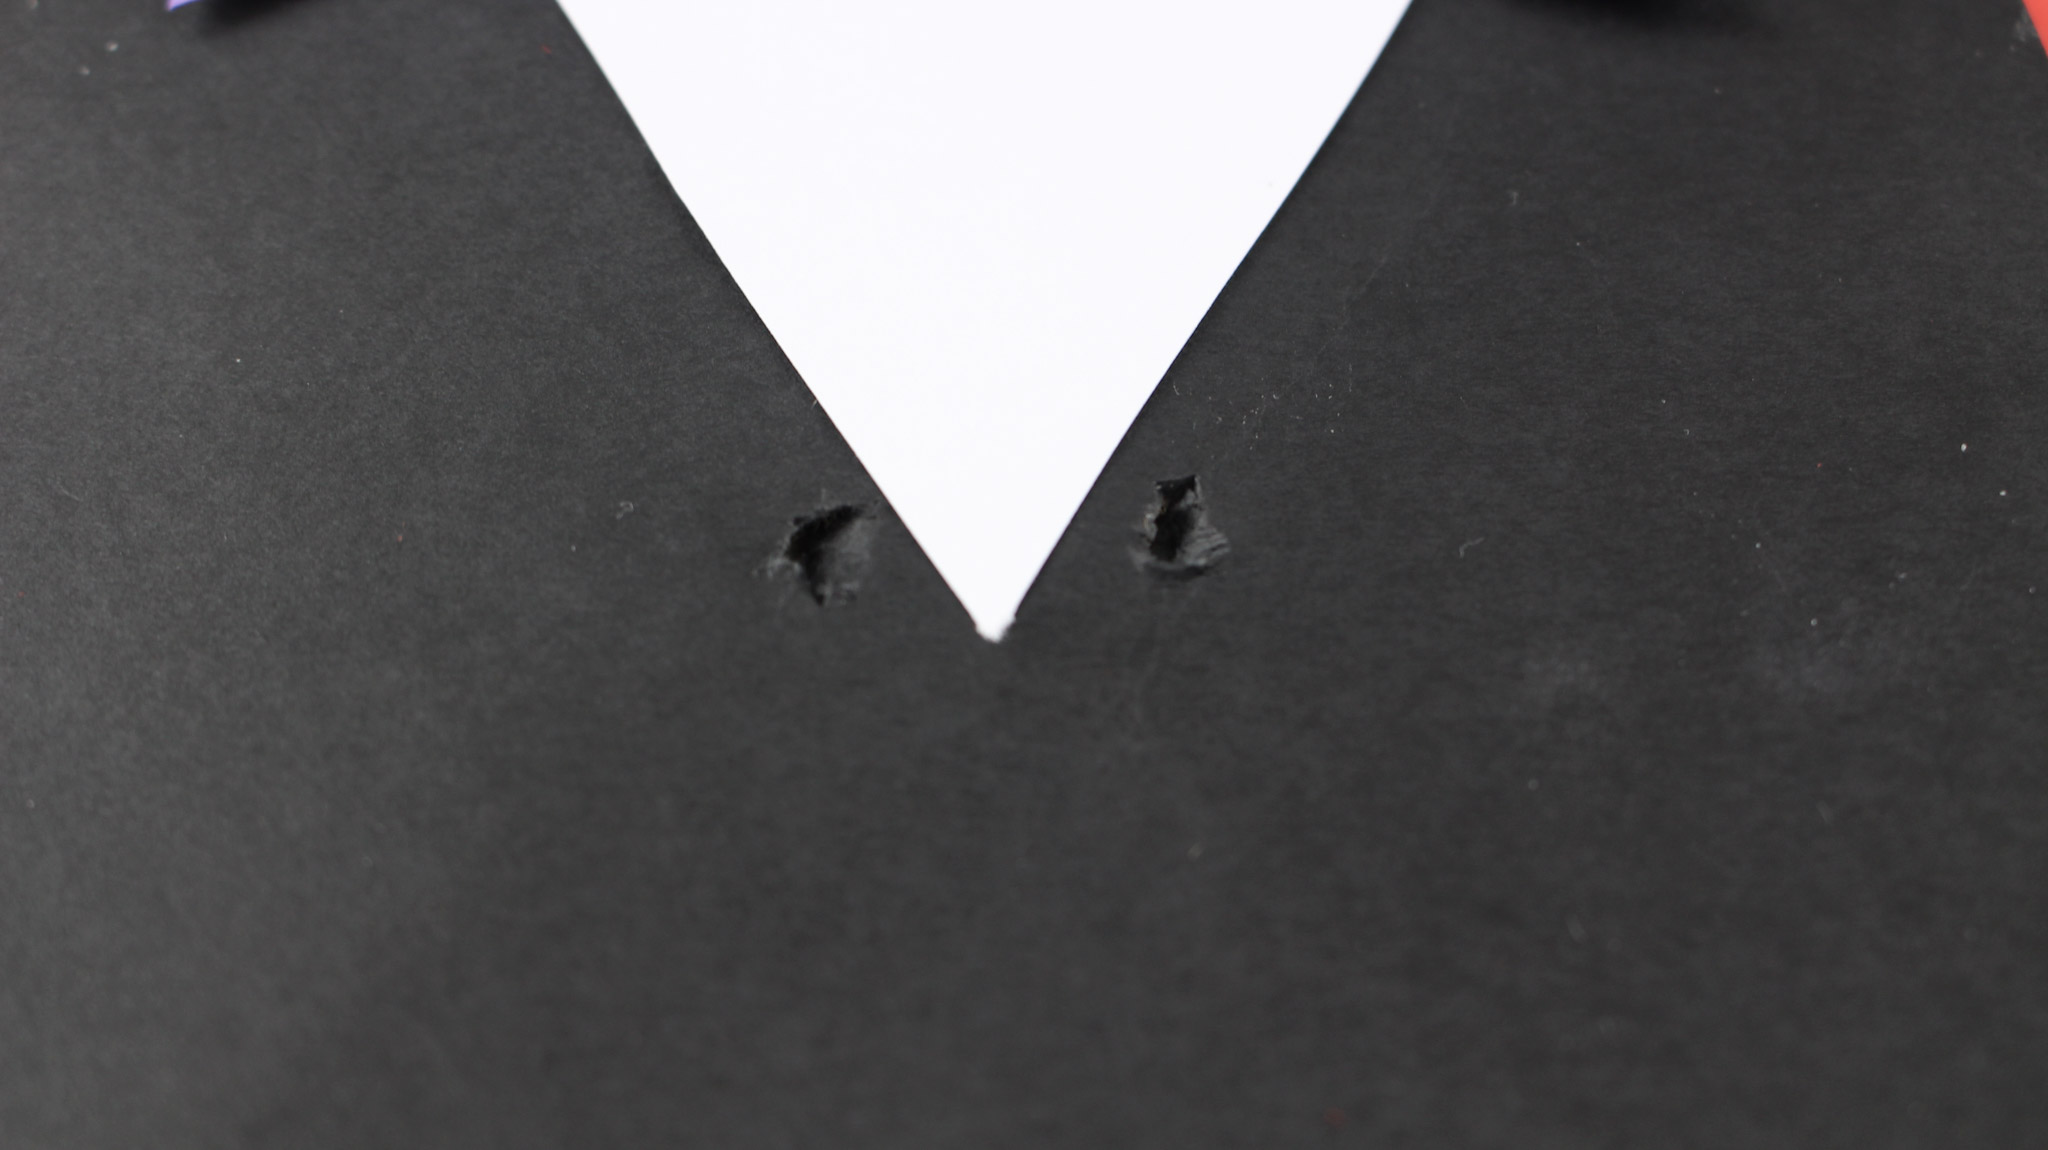
12. If you have a hole punch that will reach the middle of the bag, punch 2 holes right at the tip of the triangle of the vampires’ white shirt. My hole punch would not reach, so I used the tip of a scissors to poke two holes.
13. Thread the red ribbon through the two holes and tie a bow.
14. ENJOY!!

If you liked this post, you will also like: